So how does the App work?
A few videos tell more than words so lets go through the initial start phase together with a few clips.
When you start the app the first time you will see a start screen like this one on the left.
Everything is empty and when you press start nothing will happen, except that you see that the Start button change from „Start“ to „Stop“ and its suddenly red. But now Sound, now clicks, no Metronome at all. Why is that?
This happens because the app is based on Presets , which represent the information of Songs you have to play. And this informations, like timing, rhythm pattern, Song name, Artist and so on need to be entered first, so the App nows what to do.
So let’s do that, give the App some Data, watch the video to see how that works.
To enter a Presets tap the Preset Tab and you see a screen like this one at the beginning of the clip. This screen shows a complete List of all available Presets. Of course in the moment this list is empty since we just started the App.
So press the „+“ button in the top right section and the screen changes to the Preset input mask.
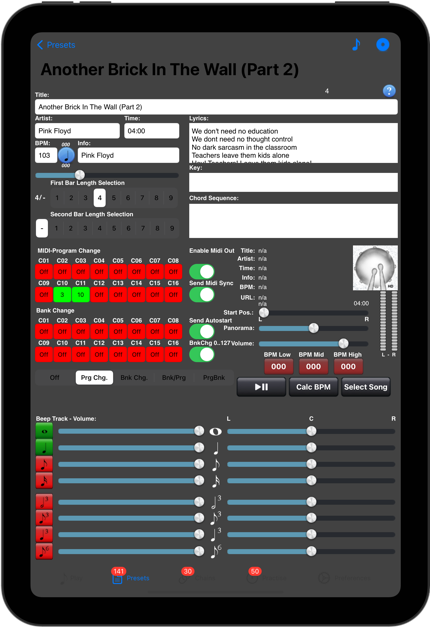
Now you see the Preset edit screen. Here you see many different fields and buttons and they all have their purpose. But for this introduction we will not go too deep into all different settings since that is done in the Presets section of this help system. We will just enter the most important data to get some noise and LED blink out of the App.
But we can even hear some sound now! Just click the „Note“ button in the right button section and you hear the current BPM click!
So we enter some Title, Artist, BPM (beats per minute, that is the actual speed of the song and then the speed the metronome plays) and Info and press the little Disk Icon in the upper right button bar to store it.
We now see the list screen again and here we have the song we just entered in the list. Of course you will see your info you entered in the fields.
This way just enter another song or two and the list looks something like this one.
Now go back to the Play Screen, press „Play Preset“ and you will see a screen similar to this one on the right.
When you press the play button now you will here a click and see red LED indicators running according to the click.
When you press „Next“ the next Preset will be loaded and you hear and see the clicks and LED‘s according to the next Presets settings.
Of course playing always all Presets from the List in the same sequence is definitely not always appropriate.
Here comes the concept of Chains (Setlist’s) into the game where you can organise Presets in a distinct order for a concert, practice, or whatever other purpose where it is important to play Presets in a sequence. Since chains use and store just links to Presets you can choose to play as many Presets even more than one time, in any order.
You find Information how to work with chains in the chapter Chain Tab of this Help System.
For now you learned the principle of the App and how you create and play Presets.
Have fun with DrumSetlist Manager!

